
How to review scanned bills and invoices
Last updated: 18 August 2026
When you drag and drop a bill or invoice into NetNada, AI reads the document and extracts the values needed for your emissions calculation — supplier details, dates, usage amounts, and units. Your job is to check that extraction against the original document and confirm it. Files waiting on you appear in the Processing & Review area of Files and Submissions.
In this article, you'll learn how to:
- Open the review screen and read the file statuses
- Understand how bills are matched to your locations automatically
- Check and correct the extracted values against the original document
- Apply the special rules for waste bills
- Assign a node and confirm the review
- Retry a bill that failed extraction
Understanding File Statuses
Each scanned file carries a status pill telling you what it needs:
| Status | What it means |
|---|---|
| Processing | Extraction is still running. Editing is locked until it finishes. |
| Needs Attention | Review the extracted values before marking the file ready. |
| Ready | Extraction looks complete — review and confirm when you're satisfied. |
| Failed | Extraction did not succeed. Retry it or correct the file. |
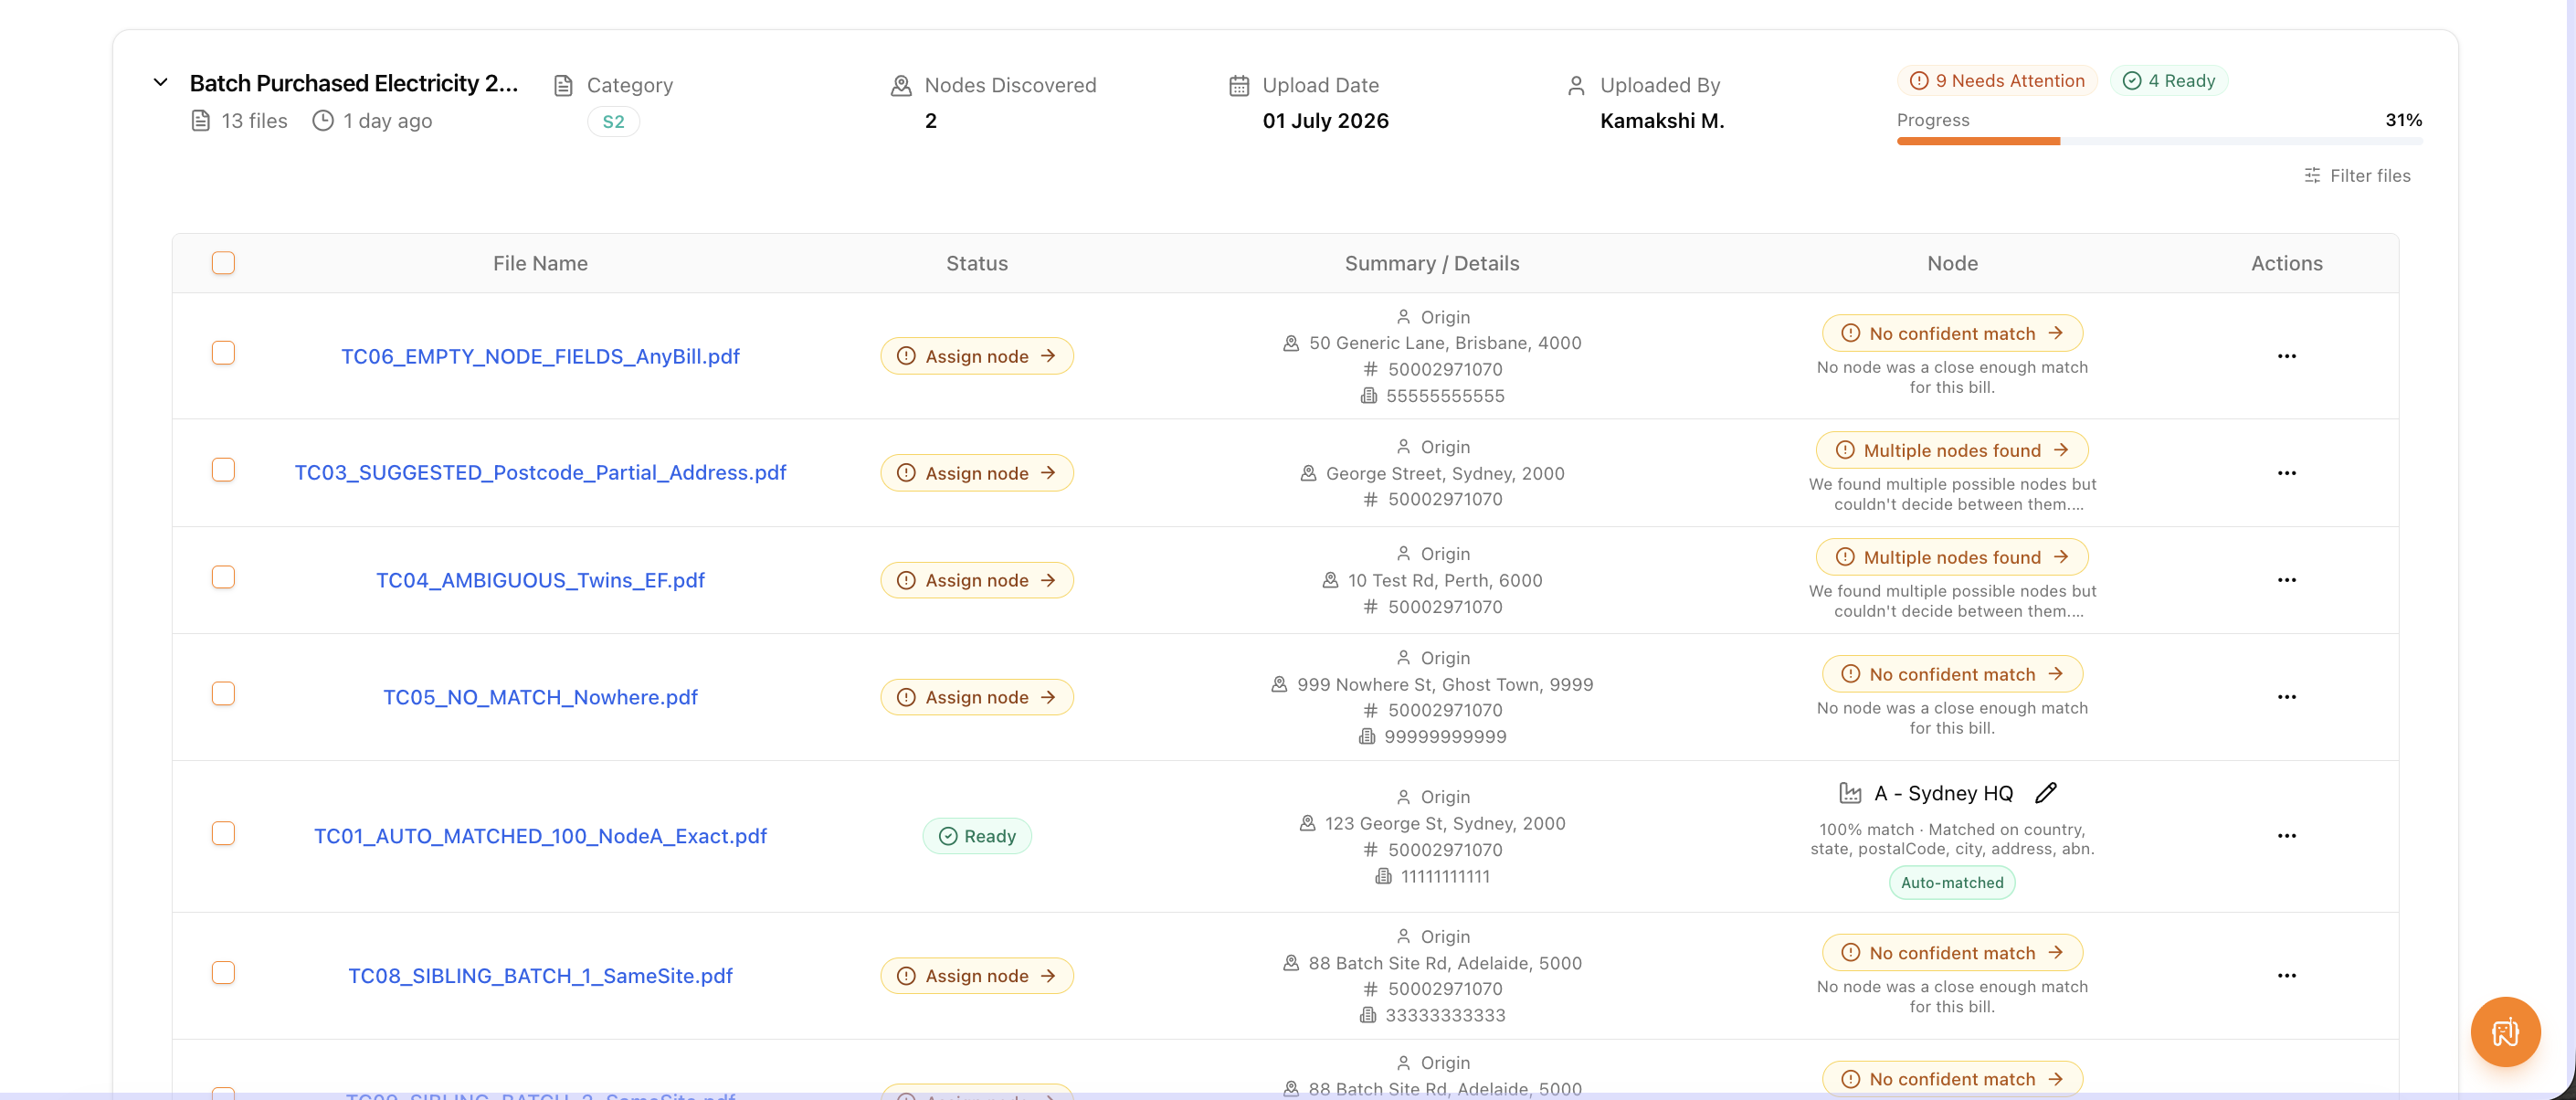
These statuses mean the same thing whatever kind of bill you're looking at — Needs Attention on an electricity bill is the same signal as on a waste bill. In the review queue, files also show action labels such as Assign node, Confirm node, Review data, or Review required so you can see at a glance what each one is waiting on.
How Bills Find Their Location
Before you review a bill, NetNada tries to work out which of your locations it belongs to. It compares the street name, postcode, city, and business registration number on the bill against the details recorded on your nodes, weighing them together rather than relying on a single text match. When the match is clear, the bill is assigned for you — Auto-matched and Auto-assigned labels show exactly what was completed on your behalf, and each bill in a batch carries its own matching status.
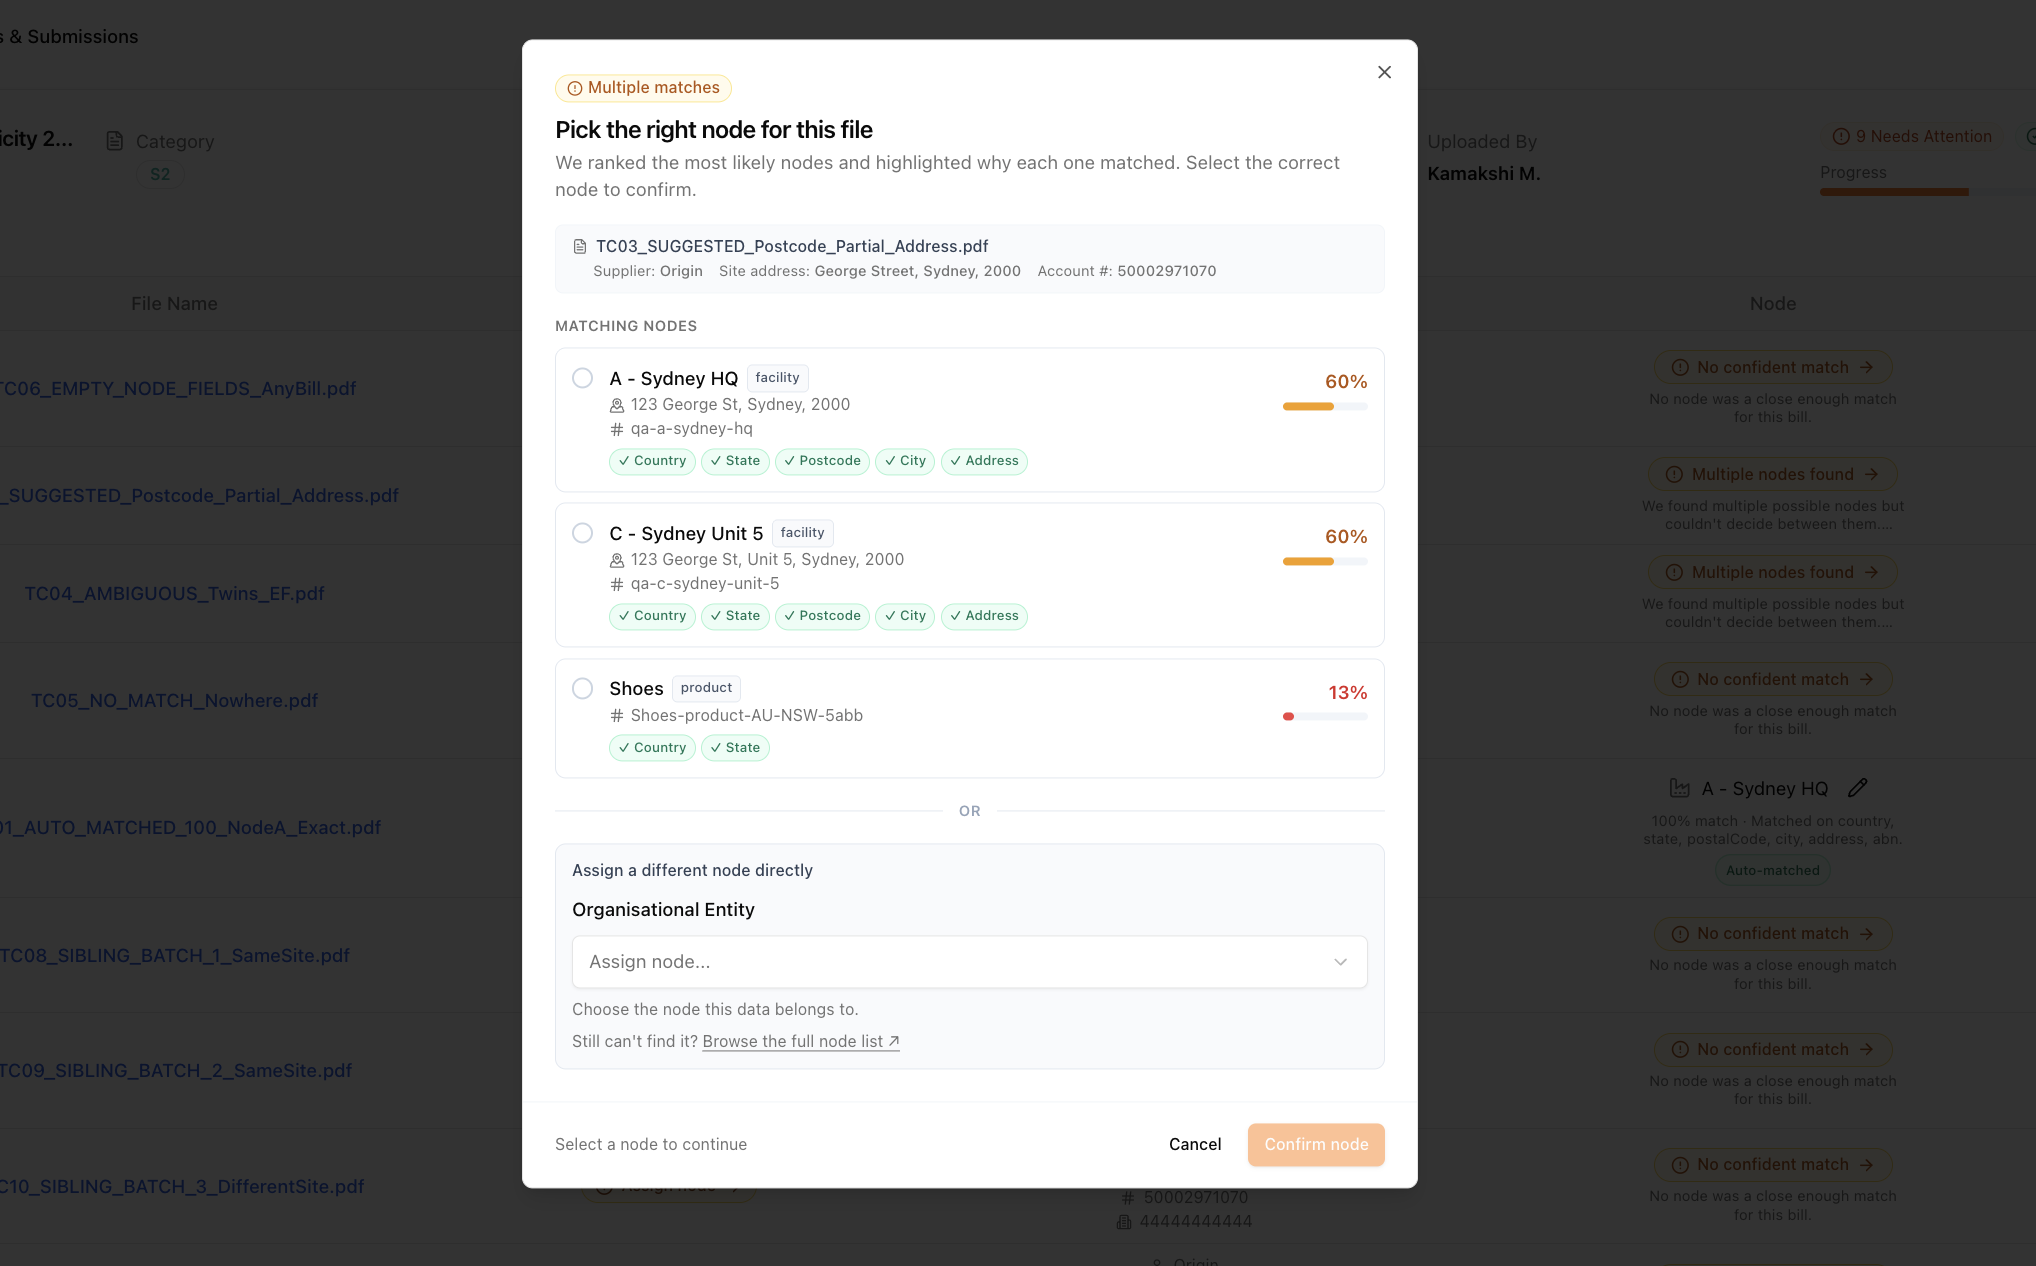
When more than one location could plausibly be the bill's home — for example, several units in the same complex — NetNada ranks the candidates and shows which fields matched for each one, so you confirm the right location rather than the system guessing.
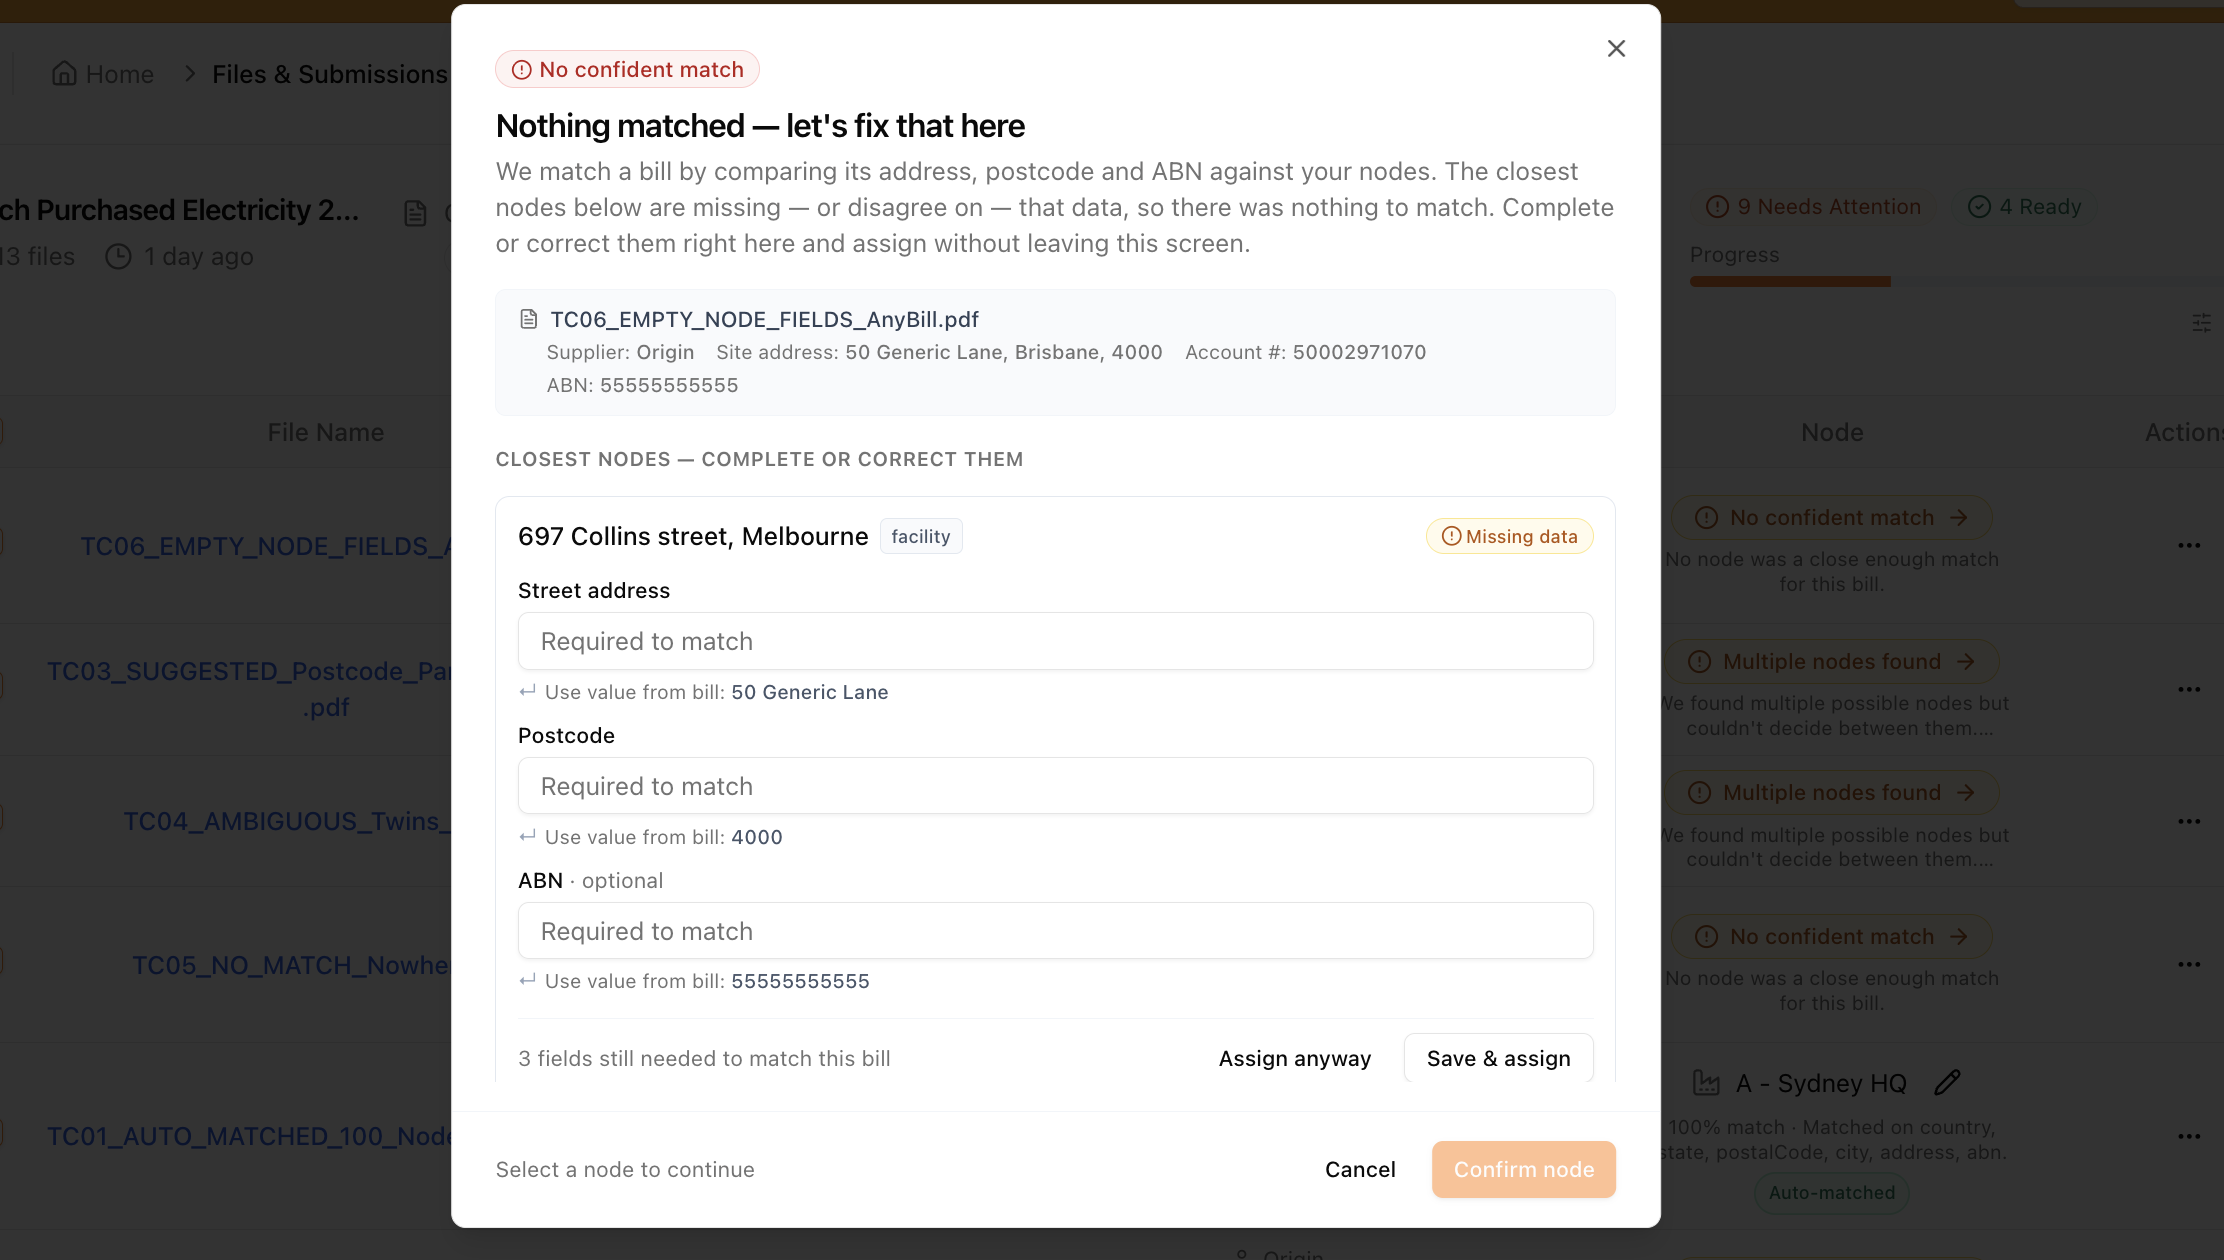
If nothing matched because the location itself is missing details, you can complete its address, postcode, or registration number right there in the review screen — using the values read from the bill — and assign it without going anywhere else. Once you confirm one bill, the same logic is applied to matching bills in the queue, and you're told how many were assigned.
Reviewing a File
Open the review screen
Check the file details
Correct any extracted values
Include or exclude rows
Assign or confirm the node
Confirm the review
Waste Bill Rules
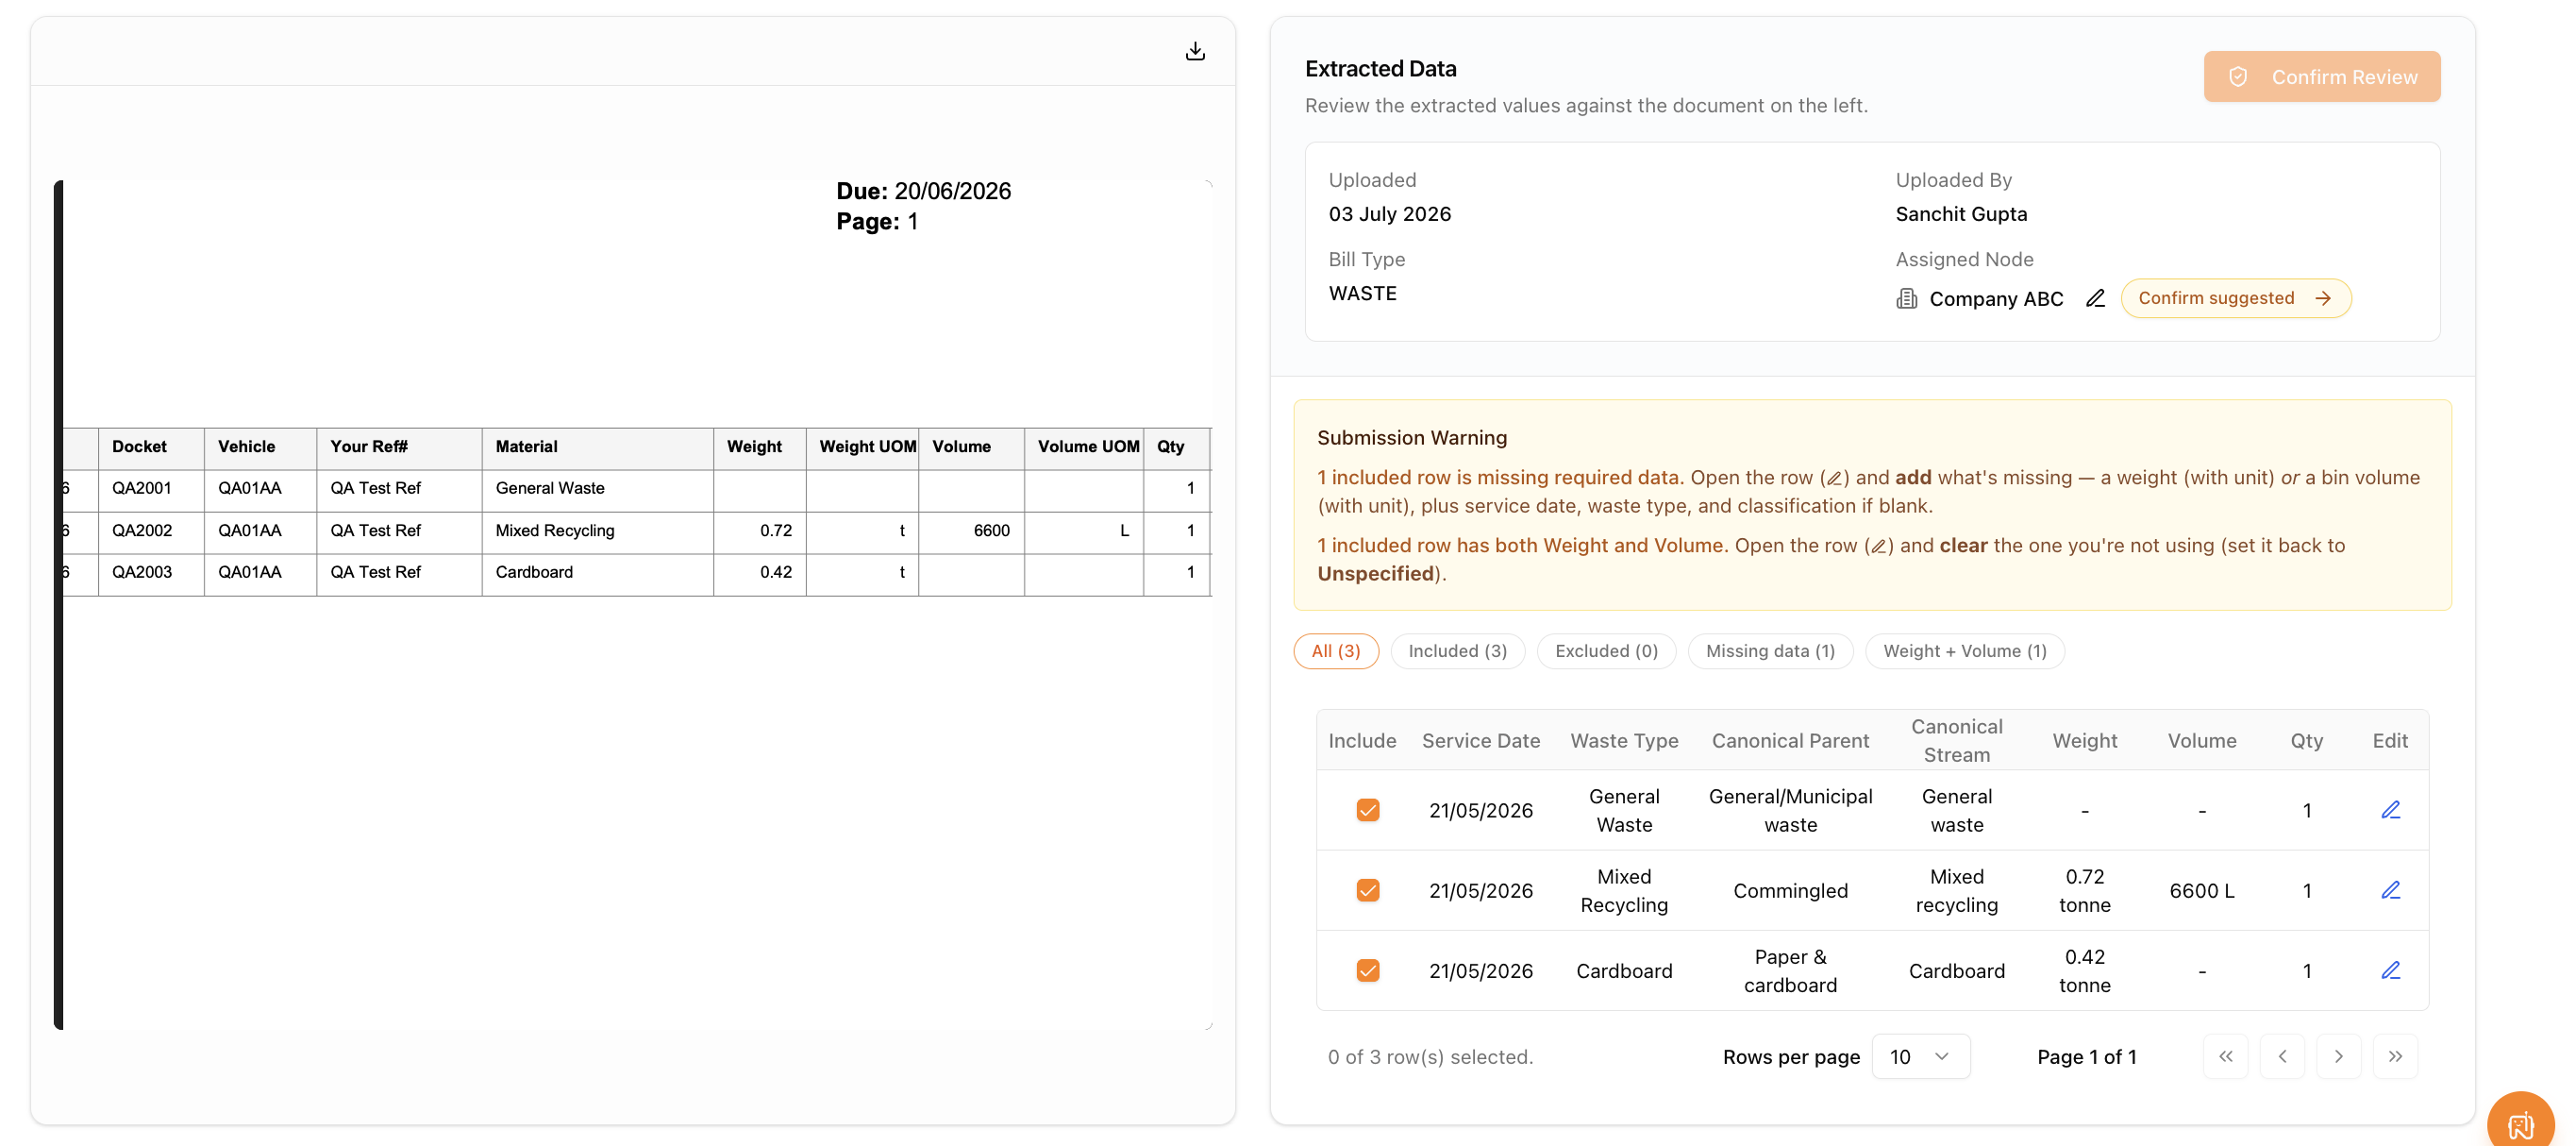
Waste bills have a few extra rules, because the same service can be billed by weight or by bin size. For every row you include:
- Each row needs a waste stream. Every included row must be matched to a recognised waste stream — for example general waste, recycling, or organics — before you can confirm.
- Use weight or bin volume — never both. A row must be based on either a direct weight or a bin volume. If a row has both, it shows as a conflict and blocks confirmation; clear one of the two.
- Weights must be greater than zero. A zero or negative weight is treated as invalid.
- Weights need a unit. Accepted weight units are kilograms, tonnes, pounds, and (US) tons.
- Bin volumes need a unit too. Accepted volume units are litres and cubic metres. If the number of bin collections is missing, it's treated as one.
The waste review screen keeps these rules manageable. Instead of stacking several alerts at once, the banner gives you one action at a time and spells out the fix — such as adding a weight or volume, or clearing the field you aren't using. Rows with issues are grouped by problem type, so filter pills like Missing data and Weight + Volume let you resolve several similar rows in a row.
Electricity Bill Costs
Electricity bills now show the total amount due and its currency as a column in the review table, read straight off the invoice. If the extraction gets the amount wrong, edit it like any other value. Having cost sit next to consumption makes it easier to reconcile what was reported against what was actually billed — and bills covering several meters no longer under-count the total.
Retrying a Failed Bill
If extraction failed — or completed without producing usable rows — a Retry OCR button appears on the review screen. Click it to run the extraction again; the file returns to Processing while it works. If a bill keeps failing, check that the document is a clear, text-readable scan rather than a low-quality photo.