
How to engage your suppliers and collect their data
Last updated: 18 August 2026
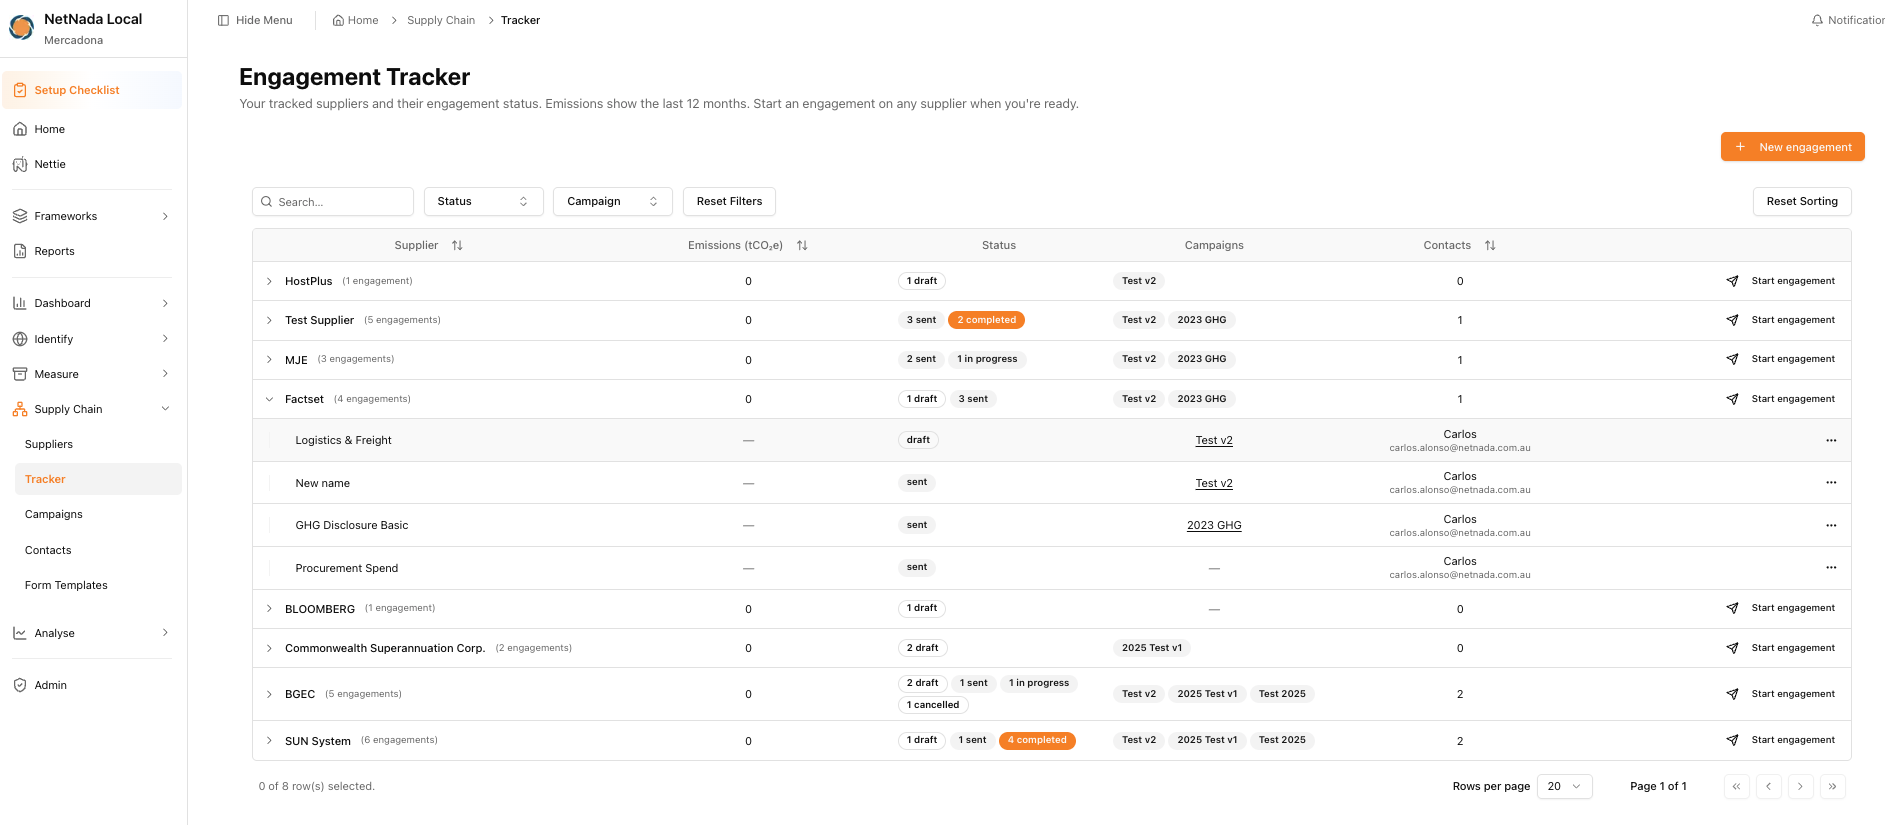
Supplier engagement lets you request emissions data directly from your suppliers and track every response in one place — no more chasing spreadsheets over email. The whole workflow lives under Supply Chain in the main navigation, split across Suppliers, Tracker, Campaigns, Contacts and Form Templates.
In this article, you'll learn how to:
- Add suppliers to the tracker and see every engagement status at a glance
- Group engagements into campaigns with their own dashboards
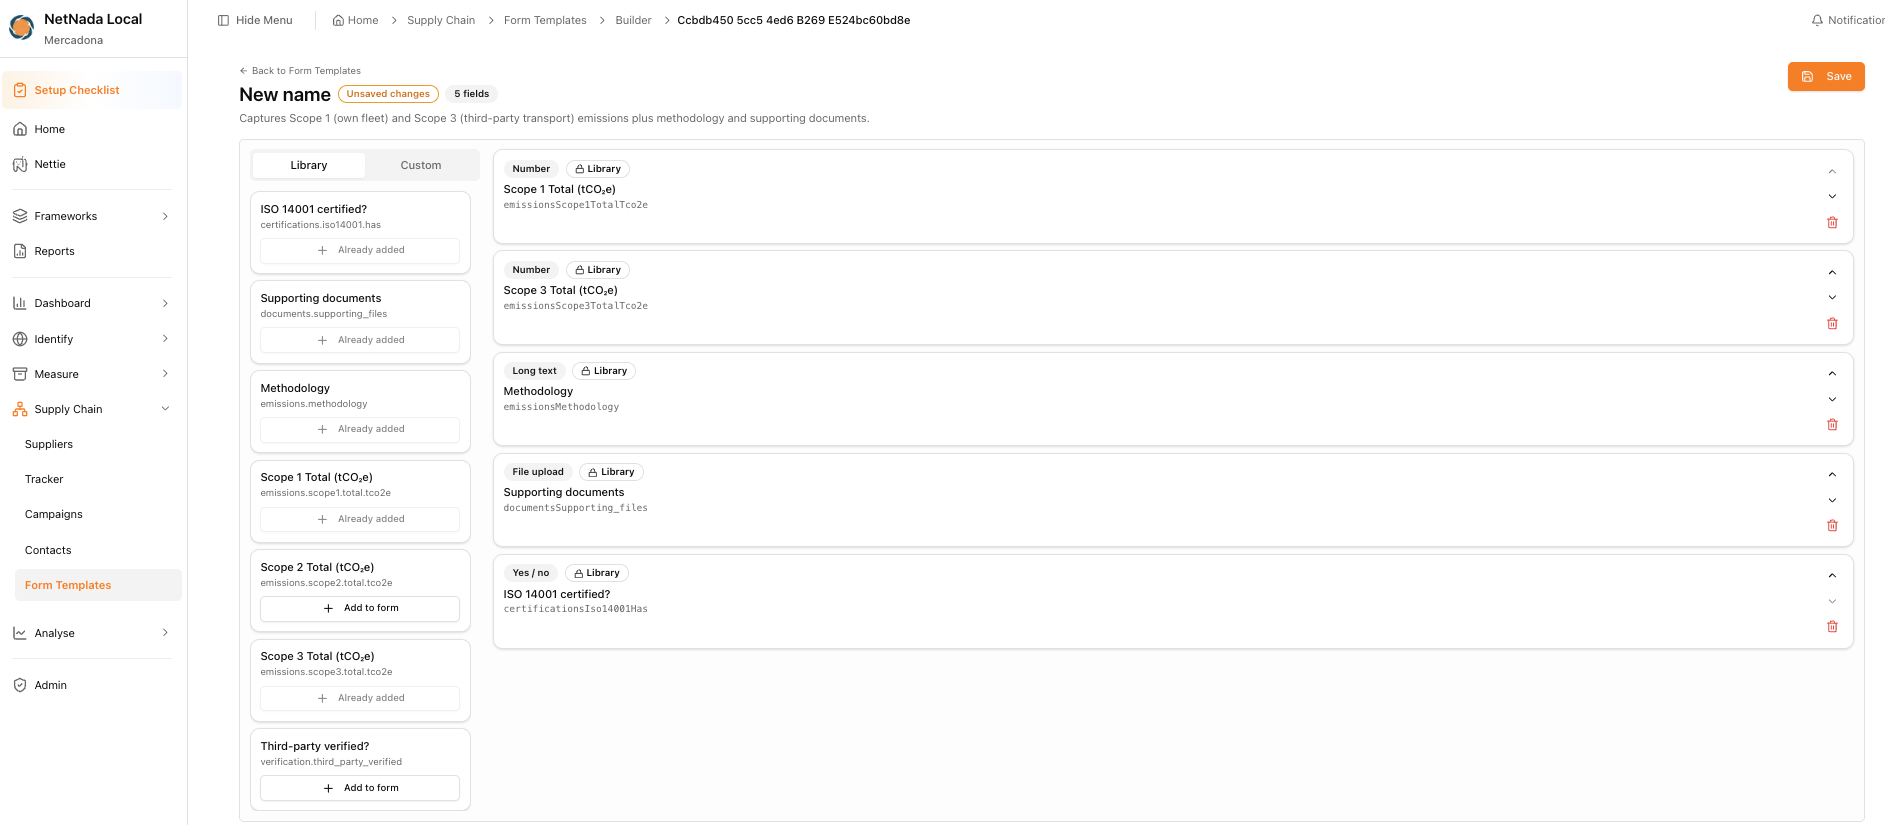
- Choose a ready-made form or build a custom one from the field library
- Send the engagement and understand what your supplier sees
Step 1: Add suppliers to the tracker
Open your suppliers table
Add suppliers to the tracker
Review the tracker
Step 2: Group engagements into campaigns
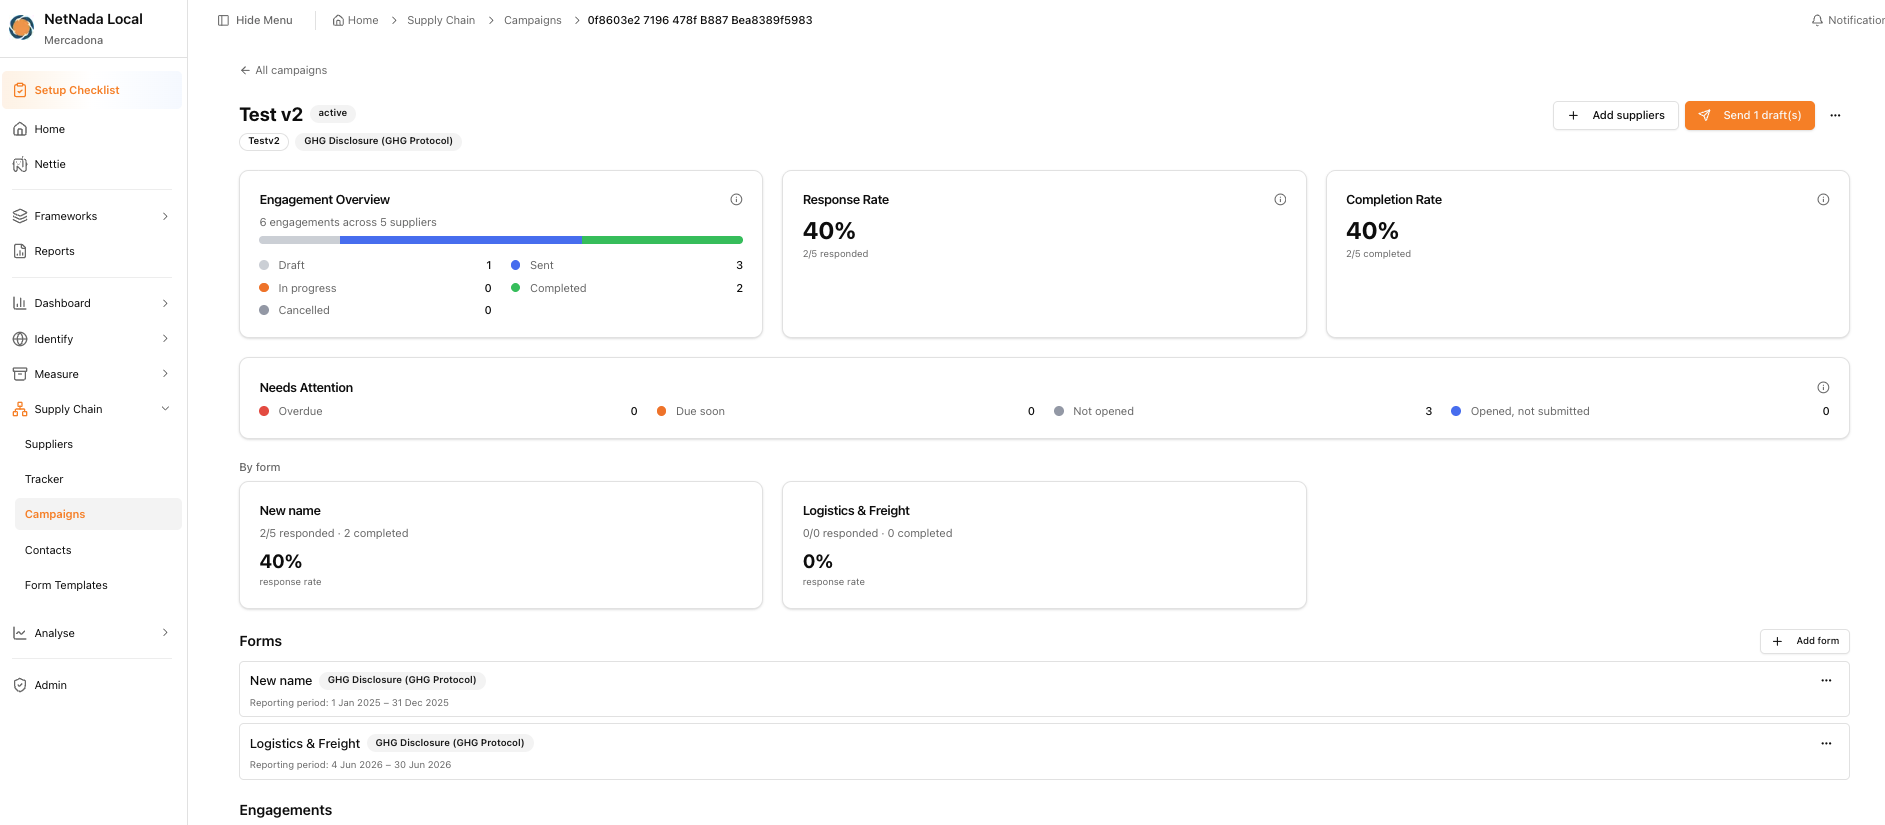
Campaigns group related engagements together — for example, all the suppliers you're surveying for this reporting period. Each campaign gets its own dashboard showing an engagement overview, response rate, completion rate, a needs-attention panel highlighting suppliers who haven't responded, and a per-form breakdown of responses.
Step 3: Choose or build a form
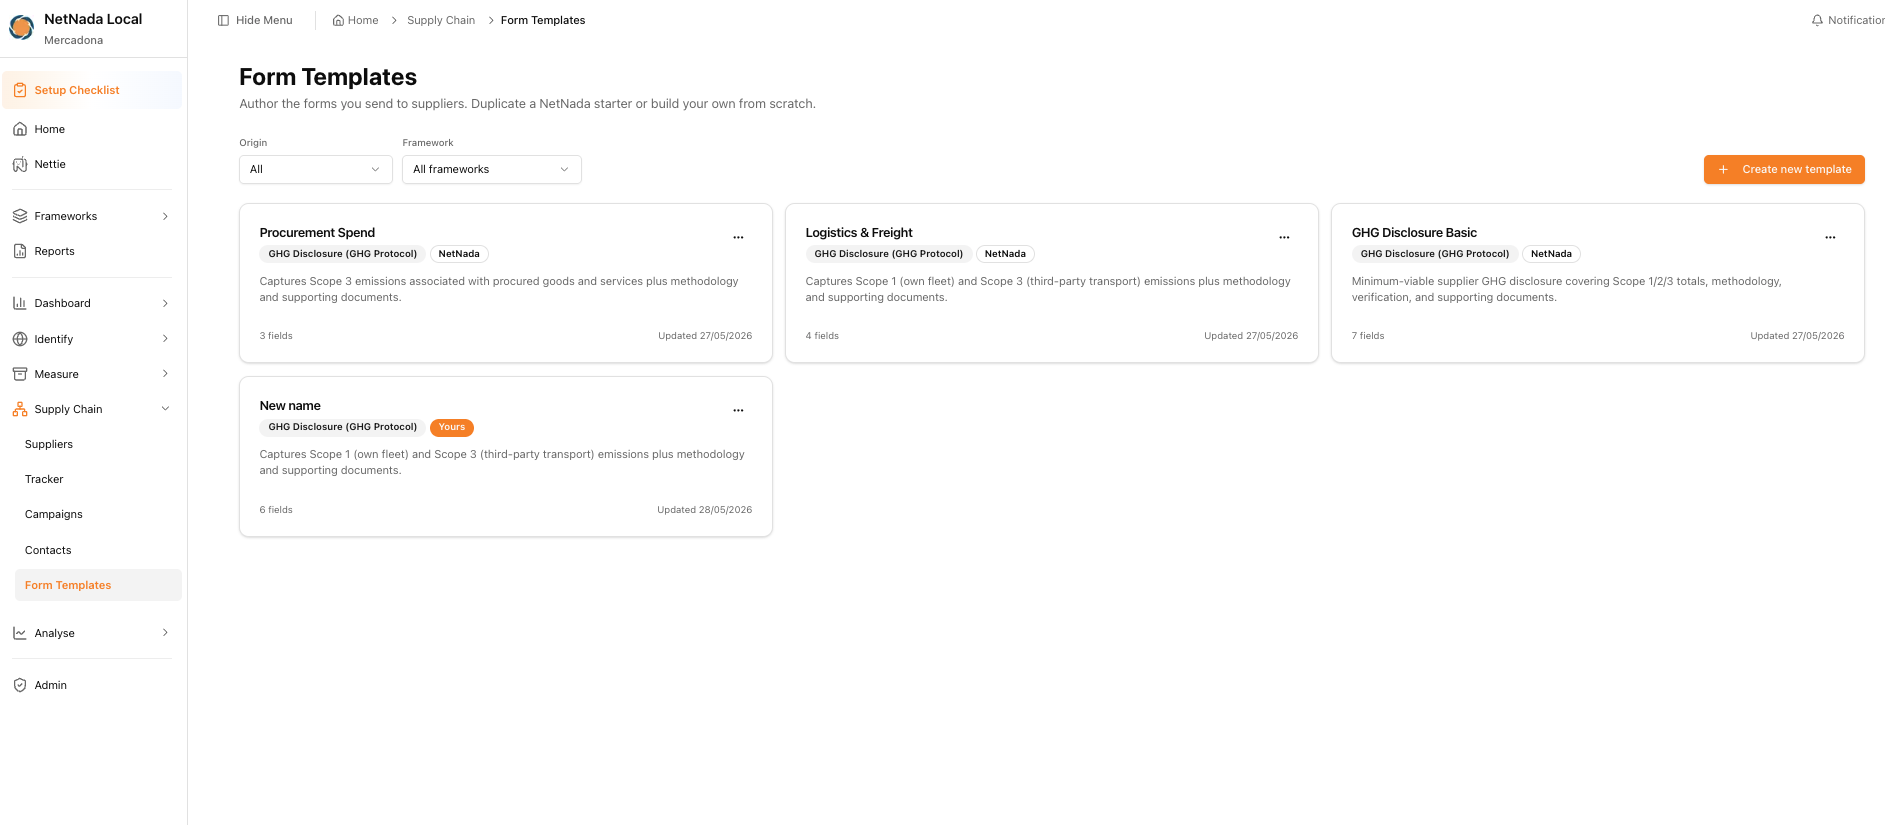
The form defines exactly what you're asking each supplier for. Navigate to Supply Chain > Form Templates and either duplicate a NetNada starter or build your own from scratch.
Start from a ready-made template
Or build a custom template
Step 4: Send the engagement and track responses
Check the supplier's contact
Start the engagement
Track responses
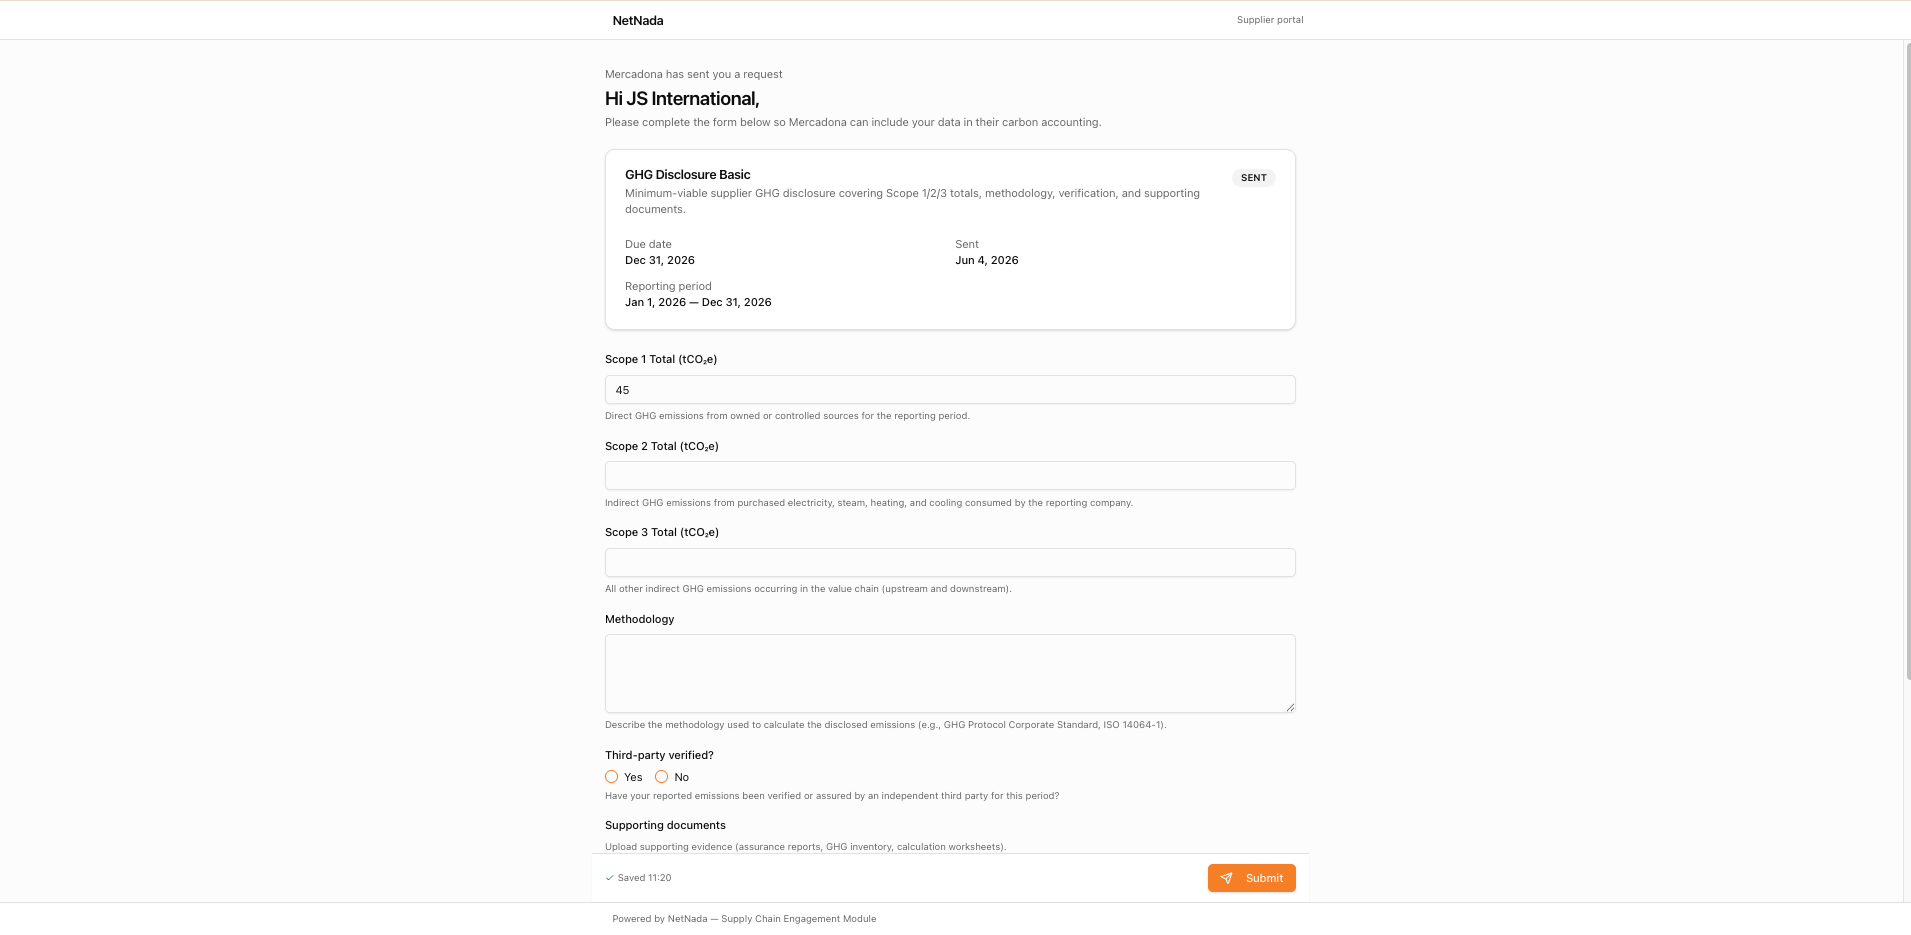
What your supplier sees
Your supplier receives a simple portal form — they click the secure link in the email, fill in the requested information, attach any supporting documents, and submit. They do not need a NetNada account or any training. If they hit trouble with the link, send them this help article written for suppliers.
Once responses come in, head to the Supply Chain overview to analyse the results against your supply chain emissions.